DIY Garage Door Spring Replacement: A Step-by-Step Guide

22 October 2024 by Jannat R.

Garage Doors


Garage door springs play a crucial role in the smooth and reliable operation of your garage door. Over time, these springs may wear out or break, requiring replacement to ensure the door continues to function properly. While hiring a professional to replace your garage door springs is always an option, it can also be a costly one. With the right tools, materials, and knowledge, DIY garage door spring replacement is a feasible and cost-effective option for many homeowners. In this step-by-step guide, we'll walk you through the process of replacing your garage door springs, from understanding the basics to final adjustments and maintenance tips. By following this guide, you can save money and gain the satisfaction of completing a DIY project around your modern home.
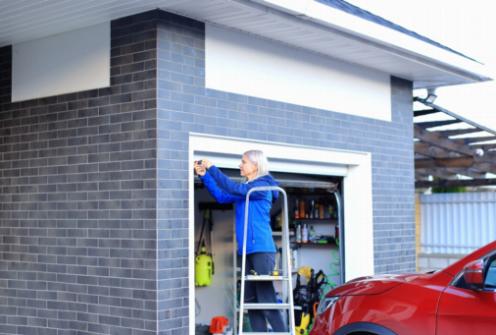
DIY Garage Door Spring Replacement: A Step-by-Step Guide

Understanding the Basics of Garage Door Springs

Garage door springs are an essential component of any garage door system, as they provide the necessary tension to support the weight of the door and facilitate smooth operation. There are two main types of garage door springs: torsion springs and extension springs. Torsion springs are mounted above the door and are wound tightly to store mechanical energy, while extension springs are located on either side of the door and stretch and contract to provide the necessary tension. Understanding the type and condition of your garage door springs is crucial for safe and effective maintenance and replacement.

Safety Precautions and Preparatory Work

When it comes to DIY garage door spring replacement, safety should be the top priority. Before beginning any work, it's important to take some necessary precautions and preparatory steps to ensure a safe and successful project. This includes unplugging the garage door opener, securing the door in the open position, and wearing appropriate safety gear such as gloves and eye protection. Additionally, it's crucial to carefully review the manufacturer's instructions and warnings, as well as consulting with a professional if there are any concerns about the project. By taking the time to properly prepare and prioritize safety, DIY enthusiasts can set themselves up for a smooth and secure garage door spring replacement process.


Gathering Necessary Tools and Materials

Before you begin the DIY garage door spring replacement, it is important to gather all the necessary tools and materials. Here is a list of the items you will need: Safety goggles, Work gloves, Adjustable wrench, Vice grips, C-clamps, Two winding bars, Tape measure, Ladder, Replacement garage door springs, Lubricating oil and Rags.

Ensure that you have all the tools and materials on hand before you start the project to avoid any interruptions or delays. Safety goggles and work gloves are essential for protecting your eyes and hands during the replacement process. The adjustable wrench, vice grips, and C-clamps will come in handy for securing and maneuvering the garage door components. Additionally, the two winding bars will be used to wind and unwind the springs. A tape measure will help you accurately measure the length and diameter of the springs. A ladder will be necessary for reaching and working on the garage door components, while the replacement garage door springs will be the key element of the project. Lastly, lubricating oil and rags will help with the maintenance and care of the newly installed springs. Once you have all the necessary tools and materials ready, you will be well-prepared to proceed with the garage door spring replacement.

Removing the Old Garage Door Springs

When it comes to DIY garage door spring replacement, one of the crucial steps is removing the old garage door springs. This is a task that requires careful attention to detail and a good understanding of the mechanism of the springs. It's important to approach this step with caution and follow the manufacturer's guidelines to ensure a safe and successful removal process. So let's dive into the step-by-step process of removing the old garage door springs.

Installing the New Garage Door Springs

Once you have removed the old garage door springs, it is time to install the new ones. Begin by positioning the new spring on the garage door track and securing it in place using the necessary hardware. Make sure to follow the manufacturer's instructions and safety guidelines during this process. Next, carefully attach the spring to the pulley system and ensure that it is properly tensioned. This is a critical step in the installation process, as incorrect tensioning can lead to operational issues and safety hazards. Use the appropriate tools to adjust the tension as needed, taking care to do so gradually and with caution. As you work on installing the new garage door springs, be mindful of the potential for injury and follow all safety precautions. Take your time and double-check your work to make sure that everything is securely in place. Once the new springs are installed, proceed to test the garage door balance and tension before making any final adjustments. Remember that proper installation of garage door springs is crucial for the safe and efficient operation of your garage door. If you are unsure about any aspect of the installation process, it is always best to seek professional assistance to ensure the job is done correctly.

Testing the Garage Door Balance and Tension

After installing the new garage door springs, it is important to test the balance and tension of the garage door. Start by manually opening and closing the door a few times to see if it moves smoothly and without any jerking or sticking. If the door seems to be balanced and operates smoothly, move on to the next step. To test the tension, disconnect the garage door opener and manually lift the door to about halfway open. If the door stays in place without rising or falling, the tension is properly set. If the door rises or falls, you will need to adjust the tension using the adjustment screws on the springs. It is important to note that testing the balance and tension of the garage door should be done with caution and care. Improperly adjusted tension can cause the door to slam shut unexpectedly or to open too quickly, posing a risk for injury or property damage. If you are unsure about how to test the balance and tension of your garage door, it is best to seek the help of a professional.

Final Adjustments and Maintenance Tips

After completing the installation of the new garage door springs, it's important to make final adjustments to ensure that everything is functioning properly. This may include adjusting the tension and balance of the door to ensure smooth operation. Additionally, it's important to perform regular maintenance on the garage door springs to keep them in optimal condition. This may include lubricating the springs and hinges, as well as periodically checking for any signs of wear or damage. By following these final adjustments and maintenance tips, you can ensure that your garage door springs continue to work effectively and safely for years to come.