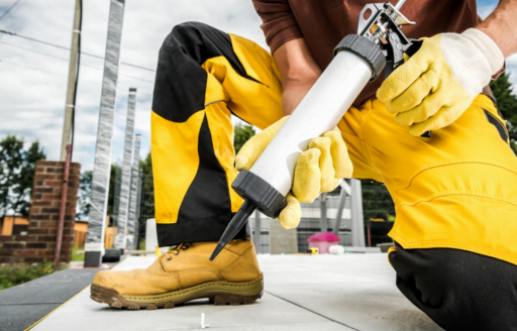
Tape is a versatile tool that can be utilized in a variety of ways during home renovations. From creating sealant lines in bathrooms and kitchens to preventing paint bleeds, tape can be a valuable asset in DIY projects. Additionally, tape can be used for temporary mounting solutions, draft proofing windows and doors, labeling cords and cables, crafting DIY artwork mounts, and securing rugs and carpets in place. Explore these innovative ways to use tape in your next home renovation project.

Creating Sealant Lines for Bathroom and Kitchen
When it comes to home renovation projects, tape can be a handy tool for creating precise sealant lines in your bathroom and kitchen. Whether you're caulking around a bathtub or sealing the edges of your kitchen sink, using tape can help you achieve clean and professional-looking results. By applying tape along the edges where you want to apply sealant, you can create straight lines and prevent any excess sealant from spilling onto surfaces where it shouldn't. This technique not only helps to improve the aesthetic appeal of your bathroom and kitchen but also ensures that the sealant is applied in the correct areas for optimal performance.
Preventing Paint Bleeds with Painter’s Tape
Paint bleeding occurs when the paint seeps underneath the edge of the painter's tape, resulting in messy and uneven paint lines. However, you can easily prevent paint bleeds by properly applying painter's tape before you start painting.
Start by properly preparing the surface you will be painting on, making sure it is clean and dry. Next, apply the painter's tape along the edges where you want to create clean paint lines. Press down firmly on the tape to ensure it is properly adhered to the surface.
Before you start painting, it is a good idea to seal the edges of the painter's tape with a small amount of the base paint color. This helps create a barrier that prevents the new paint from seeping underneath the tape.
When painting, be sure to use a steady hand and apply an even coat of paint along the edge of the tape. Once you have finished painting, wait for the paint to dry completely before carefully removing the painter's tape. Peel the tape off slowly and at a sharp angle to ensure clean, crisp paint lines.
By following these steps and using painter's tape properly, you can easily prevent paint bleeds and achieve professional-looking results in your home renovation projects.
Temporary Mounting Solutions for Decorations and Tools
Temporary mounting solutions for decorations and tools are a practical and versatile way to add flair and functionality to your home without the commitment of permanent fixtures. With the use of tape, you can easily swap out or reposition decorations and tools as needed, allowing for easy customization and flexibility in your living space. From hanging wall art to organizing tools in your garage, tape can provide a quick and easy solution for temporary mounting needs. Whether you're looking to display a seasonal decoration or need a temporary storage solution for your tools, tape can be a valuable tool in your home renovation arsenal.
Draft Proofing Windows and Doors
Draft proofing windows and doors is a crucial aspect of home renovation to ensure energy efficiency and to keep the indoor environment comfortable. By using tape in this process, you can easily seal any gaps or cracks that may be allowing drafts to enter your home. Additionally, tape can be used to secure weather stripping along the edges of windows and doors, providing an extra layer of protection against drafts. This simple and effective solution can help lower your energy bills and improve the overall comfort of your home.
Labeling Cords and Cables for Easy Identification
Labeling cords and cables for easy identification is a simple yet effective way to keep your home organized and avoid confusion when trying to locate a specific cord or cable. By using tape to label your cords and cables, you can easily distinguish between different devices and prevent tangles or mix-ups. Simply attach a piece of tape to each cord or cable and write the name of the device it belongs to. This will save you time and frustration when trying to untangle a mess of cords behind your TV or computer desk. With this easy solution, you can say goodbye to the days of accidentally unplugging the wrong cord or struggling to figure out which cord goes where.
Crafting DIY Artwork Mounts
One innovative way to accomplish this is by using tape in your DIY artwork mounts. By strategically placing strong adhesive tape on the back of your frames, you can easily affix them to the wall without the need for nails or hooks. This method not only simplifies the hanging process but also allows for easy adjustment and repositioning of your artwork. Additionally, using tape to mount your artwork can help prevent damage to your walls and frames, making it a practical and versatile solution for homeowners looking to showcase their favorite pieces in a creative and functional way.
Securing Rugs and Carpets in Place
Securing rugs and carpets in place is a common struggle for many homeowners, especially in high traffic areas of the home. Traditional methods such as rug pads can be costly and often do not provide a long-lasting solution. However, using tape to secure rugs and carpets is a simple and innovative way to keep them in place without damaging the flooring underneath. By applying double-sided tape along the edges or corners of the rug, it can easily be secured to the floor, preventing slipping or bunching. Additionally, using duct tape or heavy-duty tape on the underside of the rug can provide even more stability and prevent movement. This cost-effective and versatile method of using tape to secure rugs and carpets is a game changer for home renovation projects.
